In-Store #
Initiate an order #
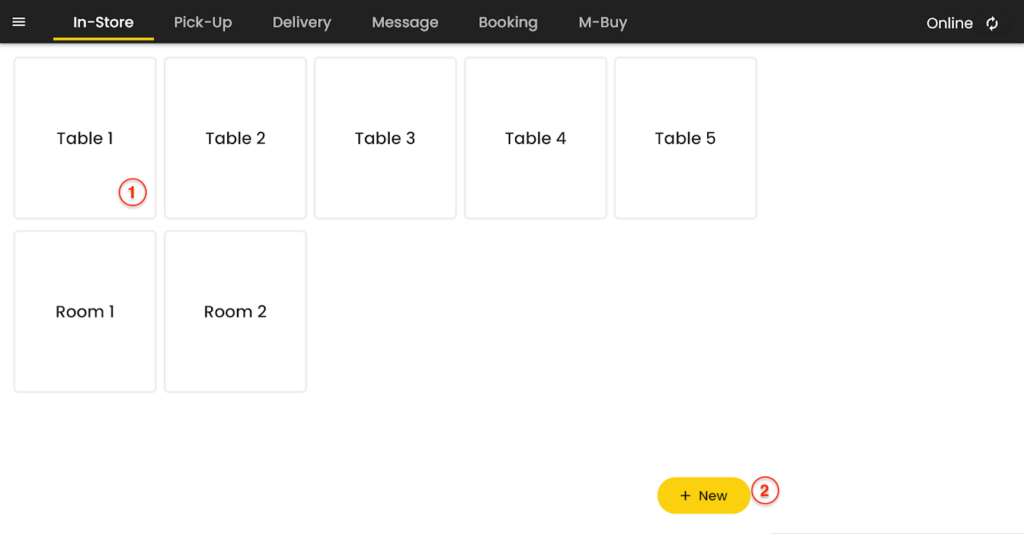
This is the dashboard for the In-store system. In order to start ordering for the table press a table (1).

After selecting the table, you will see an option on the bottom right corner “New Sales” (2). Click on ‘New Sales’ (2) to go to the menu items.
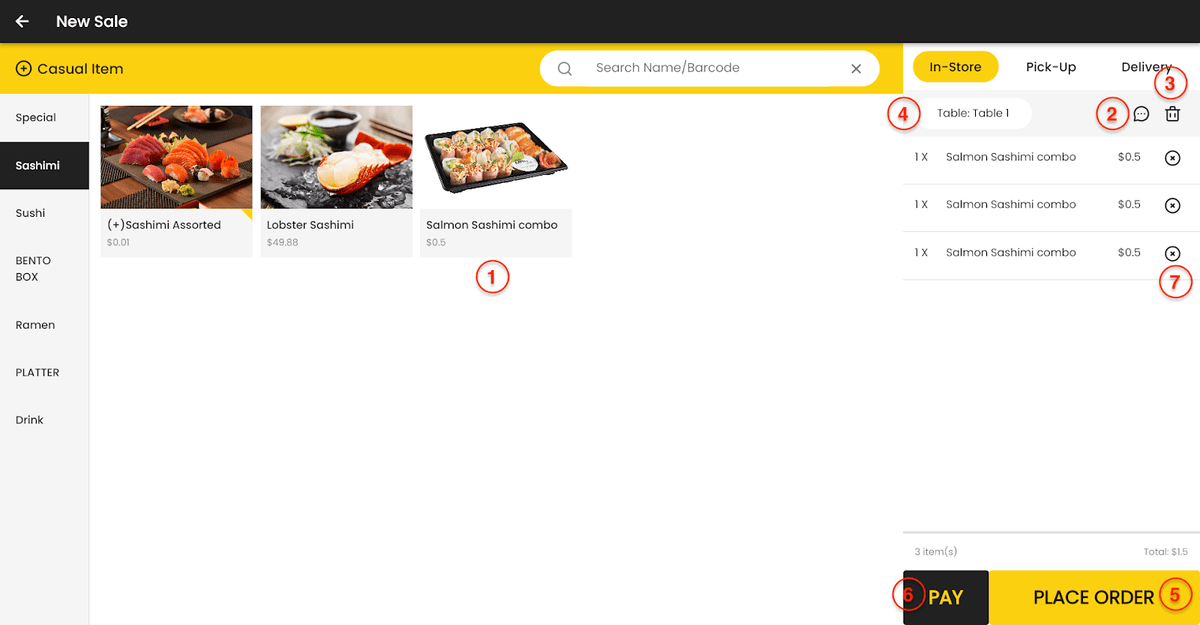
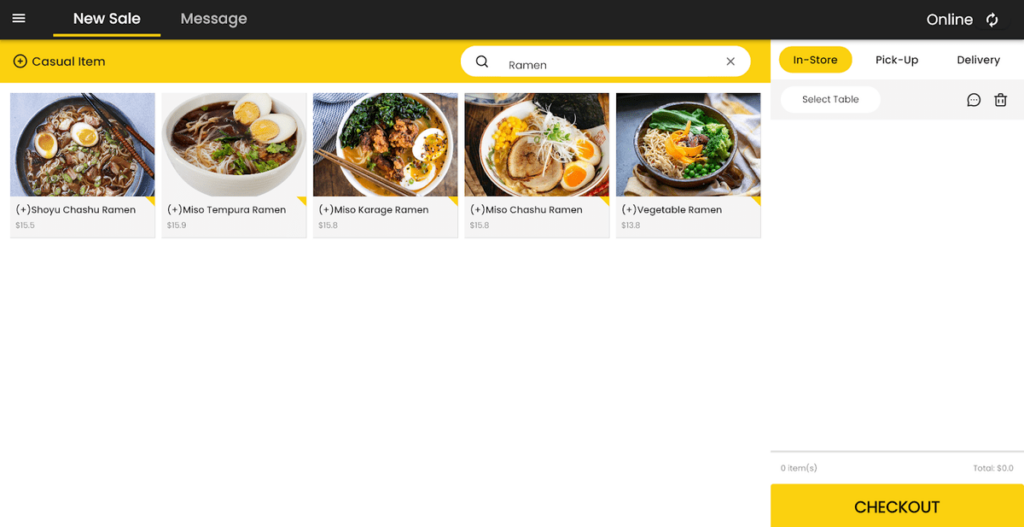
- To add the menus in the system, press on (1) and the items will be added on the right hand side.
- To delete an individual item, press on (7) to remove it.
- To delete all the items at once, press on (3).
- To change the table, press on 4.
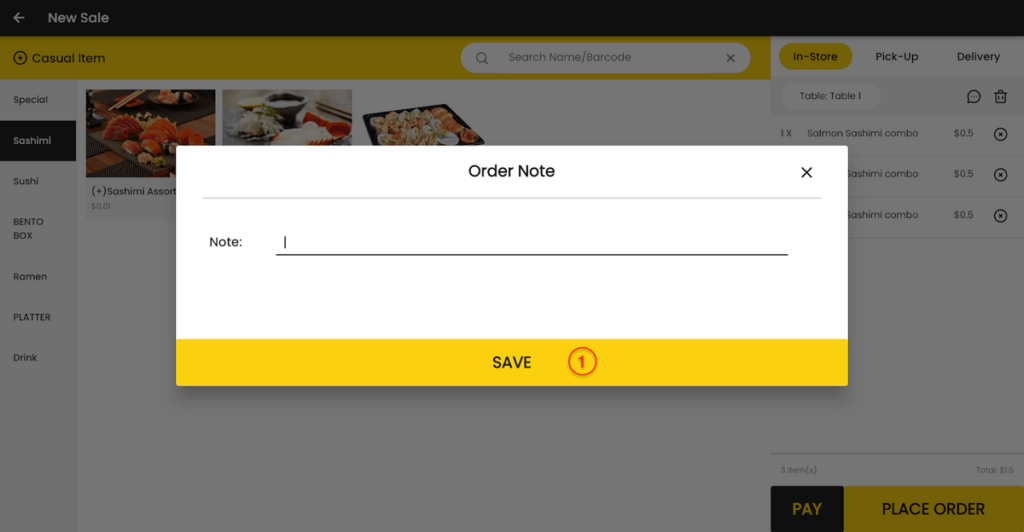
- To add notes for the items, press on 2. To save the note pres on ‘SAVE’ (1)
- To pay straight away, press on ‘PAY’ (6).
- To place an order, press on ‘PLACE ORDER’ (5).
Checkout #
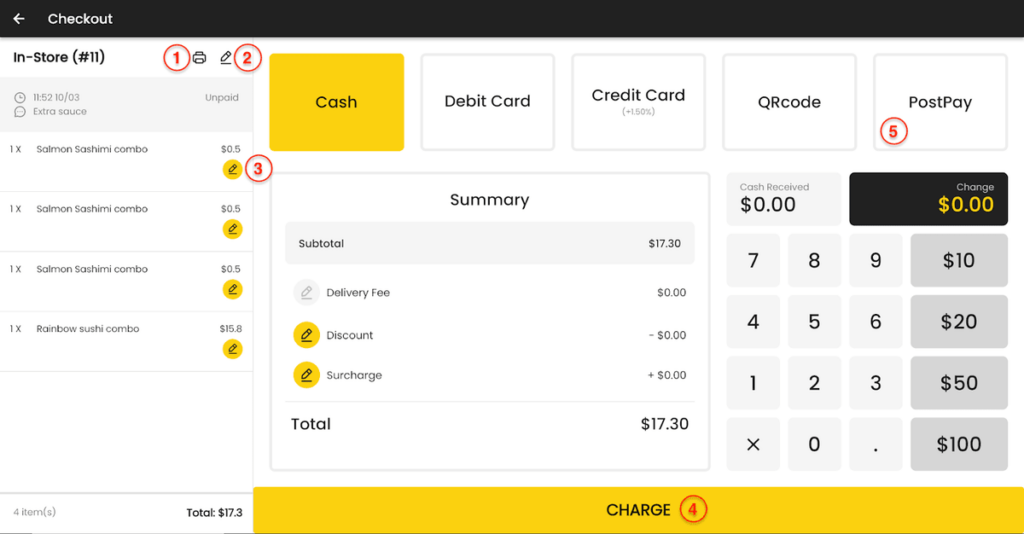
There are 5 payment options available on the top of the checkout dashboard. You can select the payment option and it will turn yellow. To charge the amount press on ‘CHARGE’ (4).
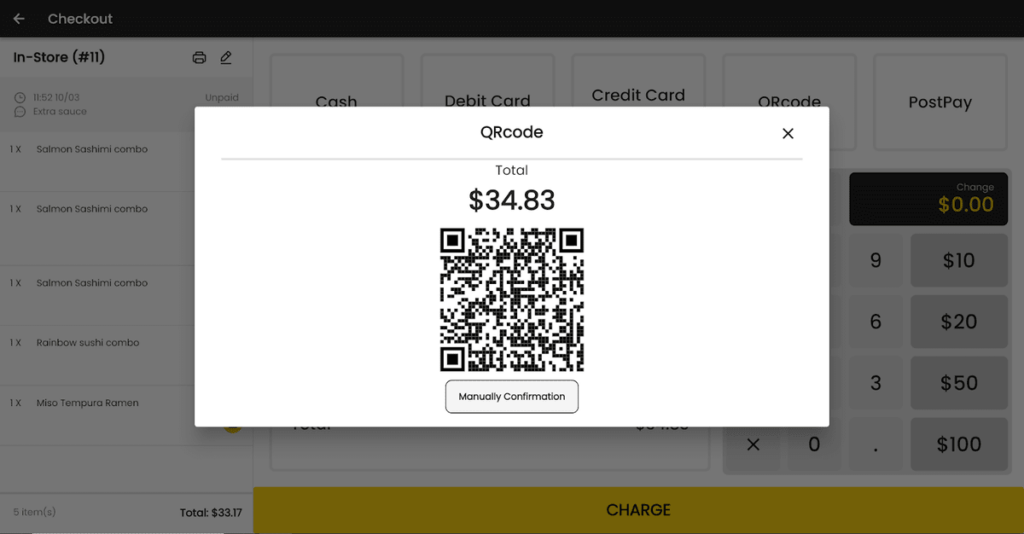
- To charge via QR code, press on ‘QR code’. After that, a QR code will be generated. Simply scan the code.
- To add a note on an individual item, press on yellow pencil icon (3).
- To change the print type i.e, receipt, invoice, slip, press (1)
- To add notes on overall item, press (2)
Pick-Up #
In the Pick-Up screen, you can make an order that will be picked up by the customer directly, or by a third party delivery service.
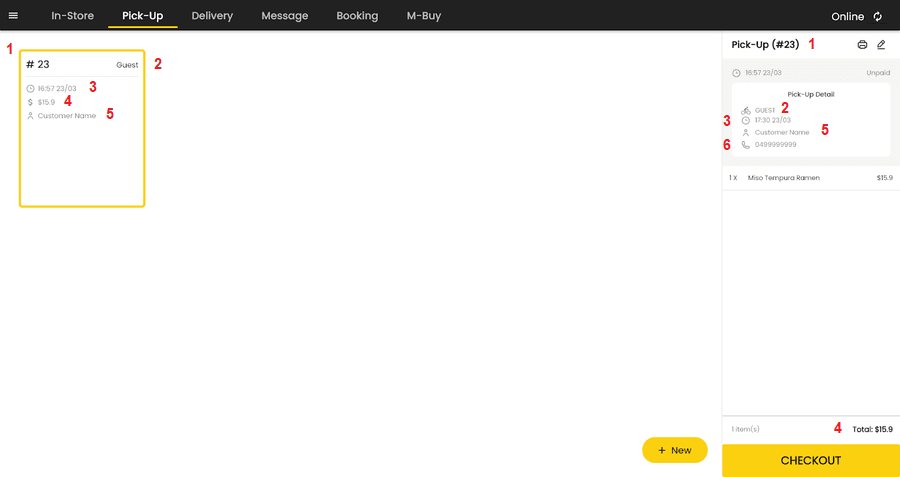
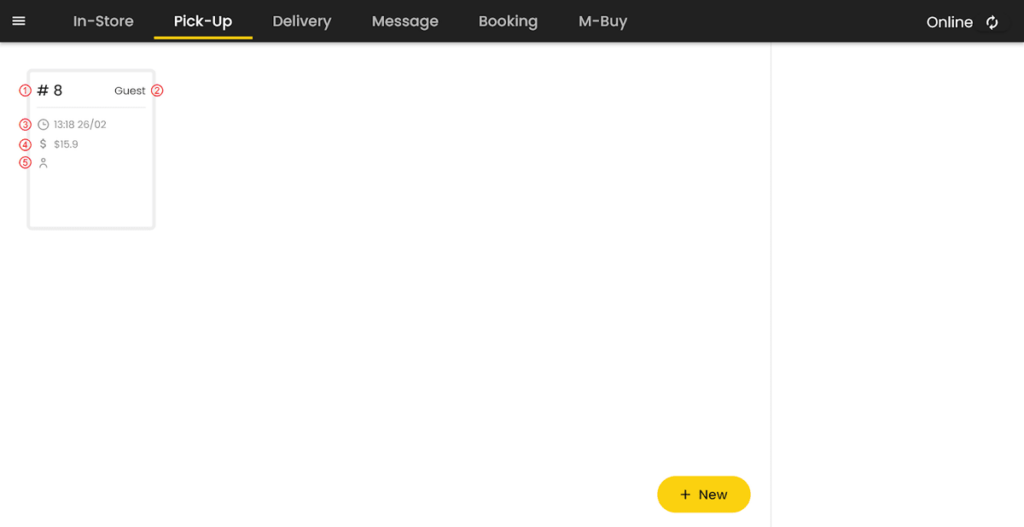
- (1): Order number
- (2): Pick-up method
- (3): Order creation time and date
- (4): Order price
- (5): Customer name
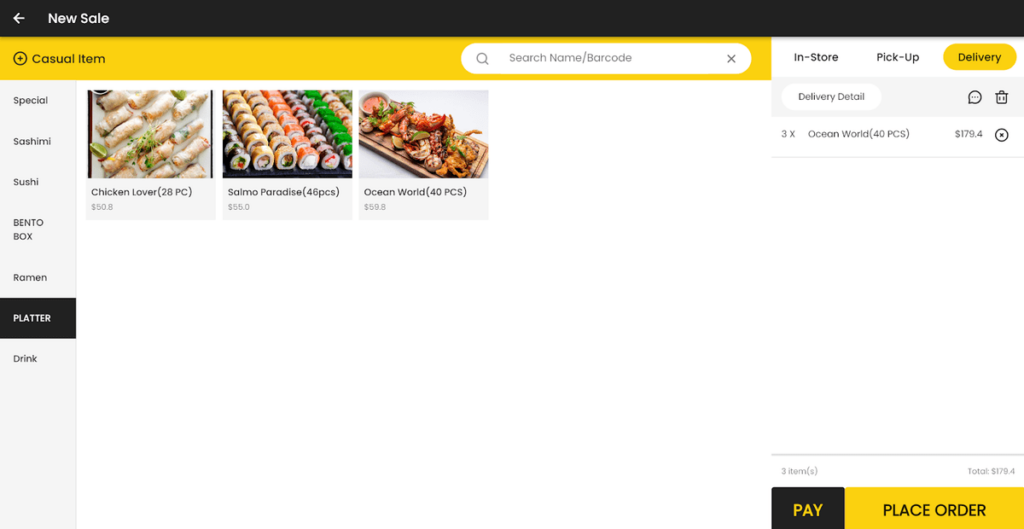
New Sale #
To make a new pick-up order, press the ‘New’ button.
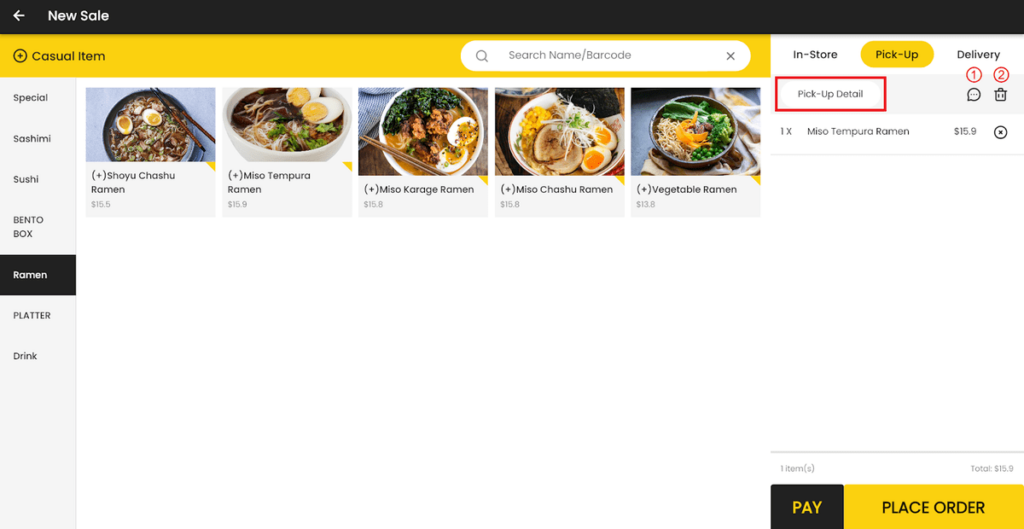
When creating a new Pick-Up order in the New Sale screen, the ‘Pick-Up Detail’ button is found to the left of the Order Note (1) and Empty Cart (2) icons, replacing the Table button in the In-Store tab.
Press ‘Pay’ to collect payment from the customer immediately, or ‘Place Order’ to save the order to the Pick-Up screen when waiting for them to collect their order.
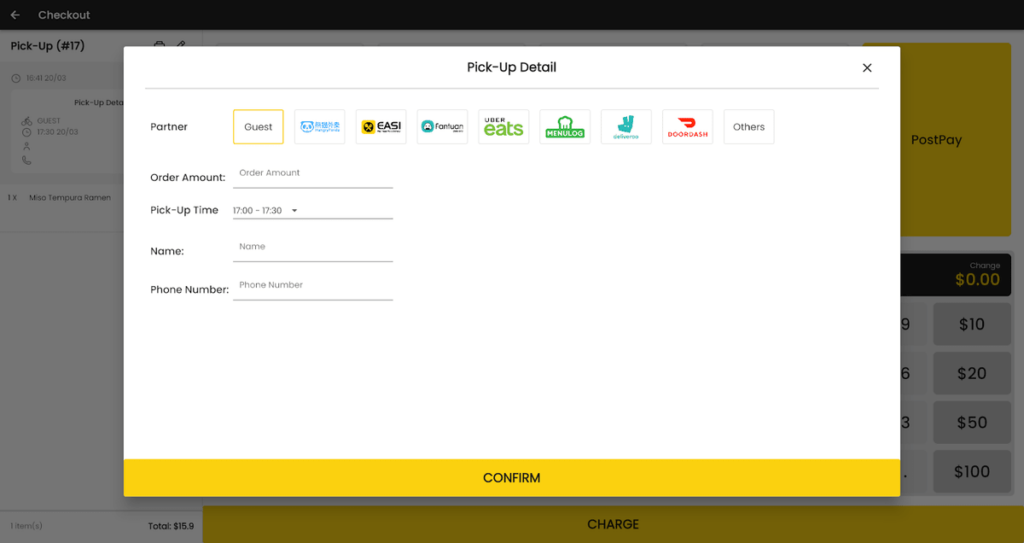
In the Pick-Up Detail screen, you can enter the pick-up time for the customer to collect the order, the customer’s name, their contact phone number, and specify if the customer will pick it up themselves, or the delivery service the customer chooses.
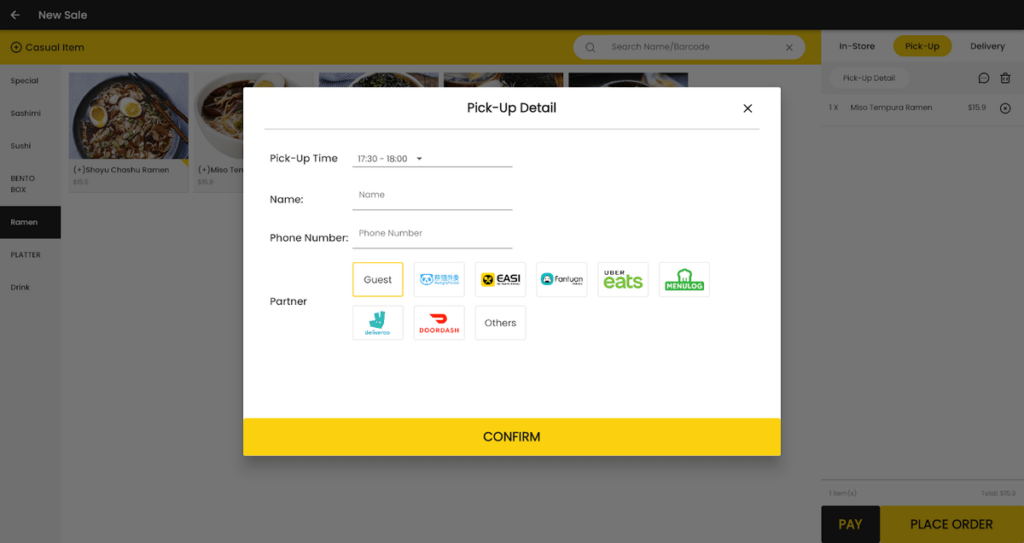
- Pick-Up Time (required): Select a half-hour time slot the customer must pick up their order within.
- Name: The customer’s name.
- Phone Number: Enter the customer’s Australian mobile or landline contact phone number.
- Partner: Select ‘Guest’ if the customer will pick up the order themselves, one of the listed delivery services (HungryPanda, Easi, Fantuan, UberEats, Menulog, Deliveroo or DoorDash), or ‘Others’ for another delivery service not listed.
Press ‘Confirm’ to save changes and return to the New Sale screen.
After pressing ‘Place Order’ in the New Sale screen, you will be sent back to the Pick-Up screen, where the order that was just placed is at the end of the order queue.

Tap the order to select it, which will display its details in the panel in the right of the screen, where you can print receipts for the order, edit it and accept payment for it. Within ‘Pick-Up Detail’, the delivery method, pick-up time, customer name and contact phone number are listed.
Press ‘Checkout’ when you are ready to accept payment from the customer.
Edit Order #
To edit an order, press the pencil icon in the top right corner of the order pane. In this screen, you can edit pick-up details, add and remove items and change item quantities, add order notes and cancel the order.
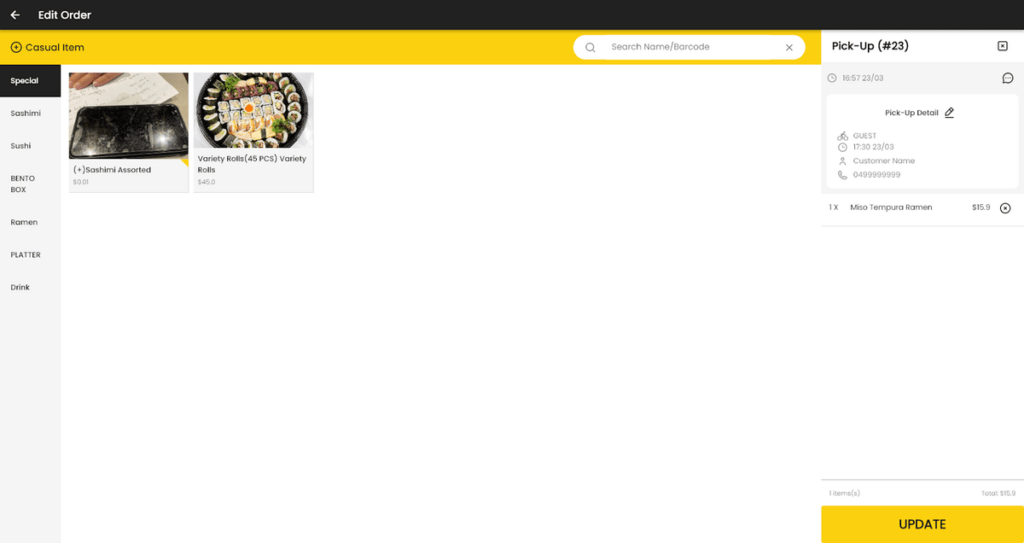
To save changes, press the ‘Update’ button.
Checkout #
In the Checkout screen, there are added options to edit the pick-up details of the order, as well as entering pick-up details in the PostPay payment method.
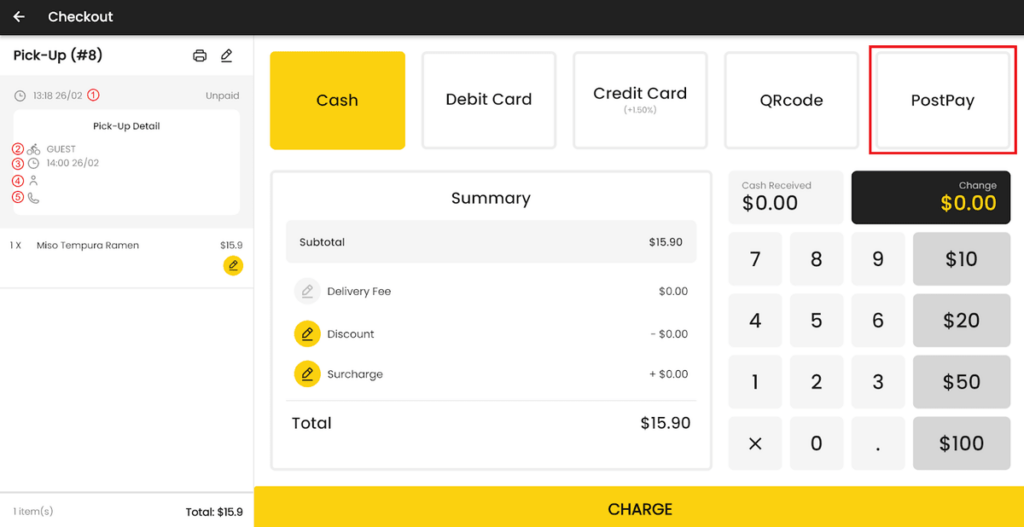
Press the pencil icon beside the order number and the print icon at the top of the order to edit it.
The PostPay screen now has the same options as the Pick-Up Detail screen found in the New Sale screen, but has an added Order Amount option.
- Order Amount: Enter the amount received in Australian dollars. If left blank, this will default to the order price when payment is confirmed.
After confirming payment, the completed order will be found in the History screen under the Orders tab.
Delivery #
In the Delivery screen, you can make an order that will be sent to the customer’s address directly from your store.

Press the ‘New’ button to create a new delivery order.
When creating a new Delivery order in the New Sale screen, the ‘Delivery Detail’ button is found to the left of the Order Note (1) and Empty Cart (2) icons, replacing the Table button in the In-Store tab and the Pick-Up Detail button in the Pick-Up tab.
The Delivery Detail screen allows you to enter the address and details of the customer that the order will be sent to.
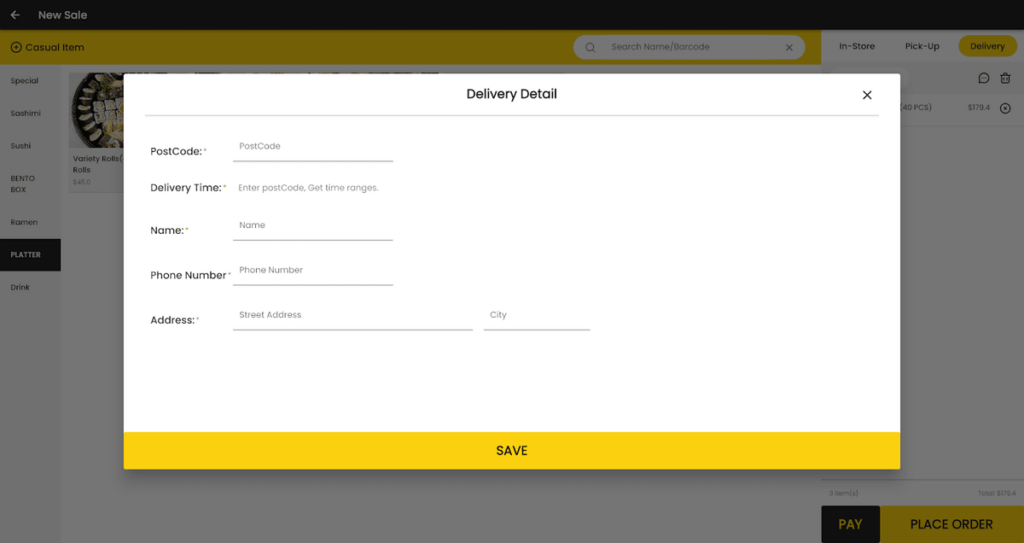
- PostCode (required): Enter the four digit Australian postcode of the customer’s delivery address.
- Delivery Time (required): Once a postcode is entered, select a half hour time slot that the order will reach the customer within.
- Name (required): Enter the customer’s name.
- Phone Number (required): Enter the customer’s contact mobile or landline phone number.
- Address: Enter the customer’s Australian address in the form of street number and name, then city/suburb/town.
Press ‘Save’ to save changes and return to the New Sale screen. You can then press ‘Pay’ to accept payment or ‘Place Order’ to save the order to the Delivery screen.
Orders that have not been completed can have their receipts printed and be edited.
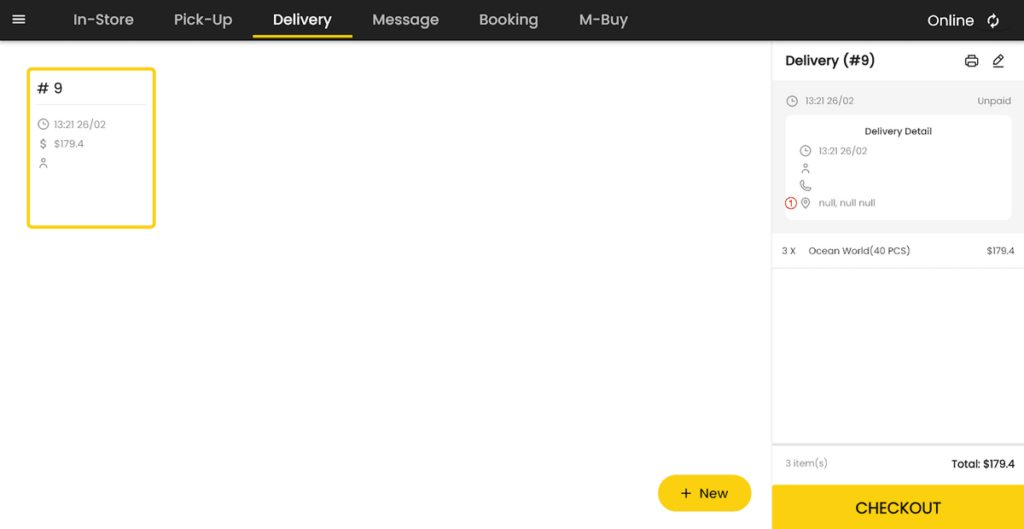
In the Checkout screen, you can edit the delivery details of the order.

Press the pencil icon beside the order number and the print icon at the top of the order to edit it.
After confirming payment, the completed order will be found in the History screen under the Orders tab.
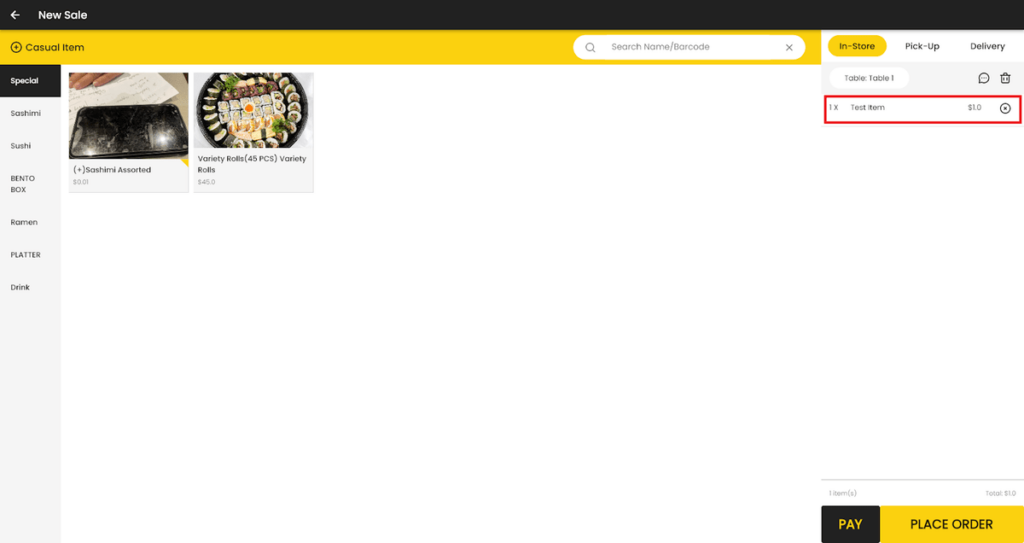
Casual Items #
Casual items are custom items that do not already exist in the store, and are created by entering their name and price. They can be added to new and pending orders of all order types on a one-time basis.
To add a casual item to an order, press ‘Casual Item’ to the left of the search bar in the New Sale or Edit Order screens.
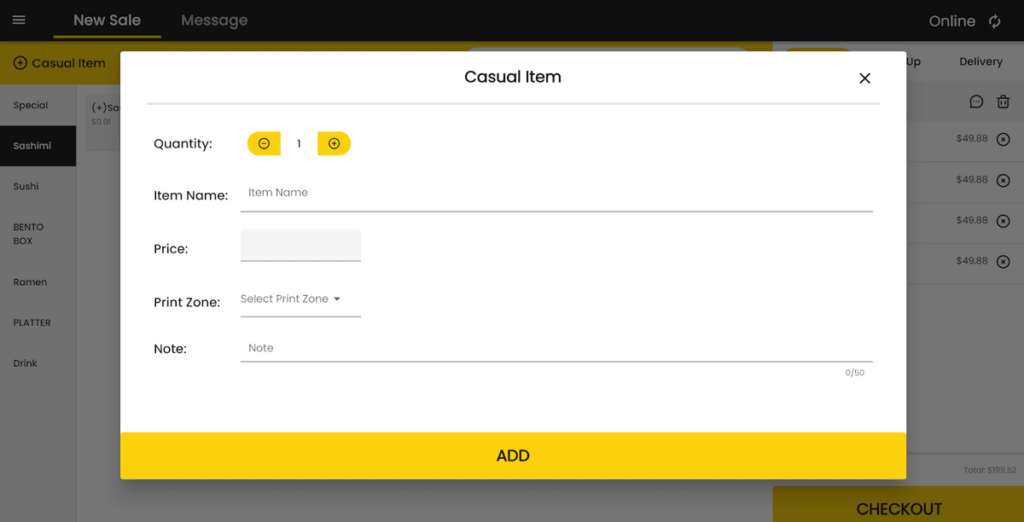
- Quantity: Enter the amount of the item to be added to the order.
- Item Name (required): Enter the name of the item.
- Price (required): Enter the individual price in Australian dollars of the item.
- Print Zone:
- Note: Add a short comment about the item, limited to 50 characters.
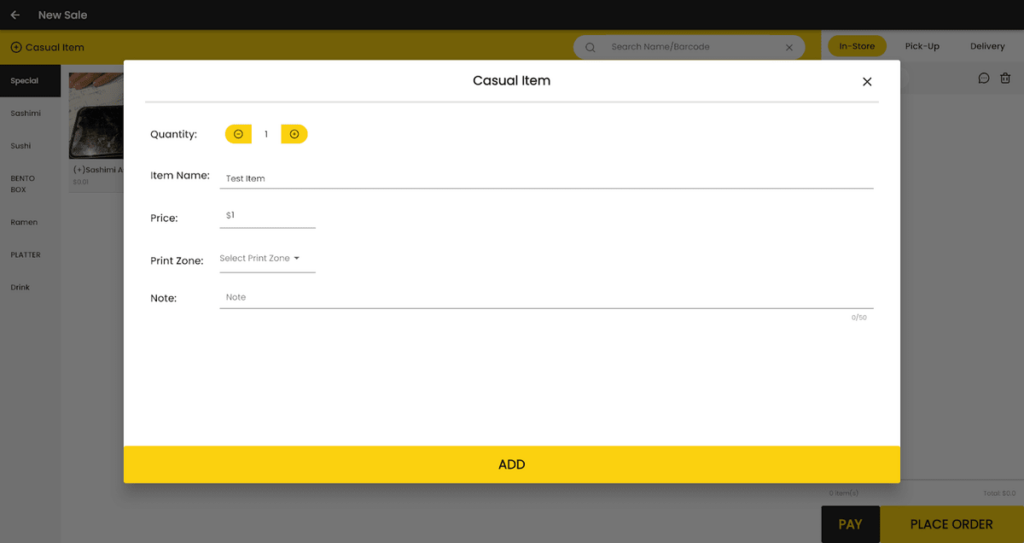
Press ‘Add’ to add the specified quantity of the item to the order.
Once the item is created, it will appear with its name and price in the order list.