- First, reboot the terminal. You do this by holding down the Clear + Func keys at the same time while the terminal is sitting on its base.
- As soon as you see the Windcave logo appear on the screen, press the Clear key.

3. When it asks you to “Enter Menu Name,” type in the code ‘5210’ using the keypad.

4. After entering the code ‘5210,’ you’ll see some menu options on the screen. Look for one called “HW CONFIG.” Once you find it, press the Menu key on the terminal.

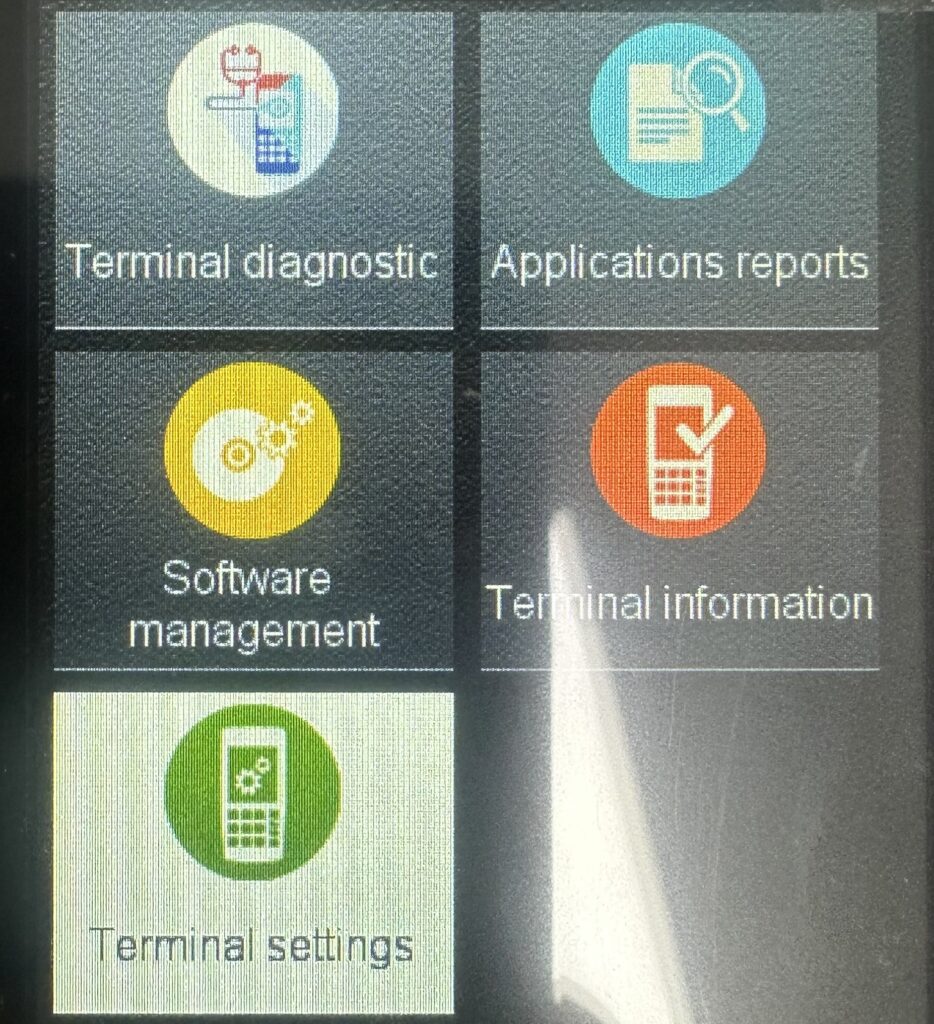
Your terminal will now bring up a series of menus that can be used via the touchscreen as shown.
5. Press Control Panel.

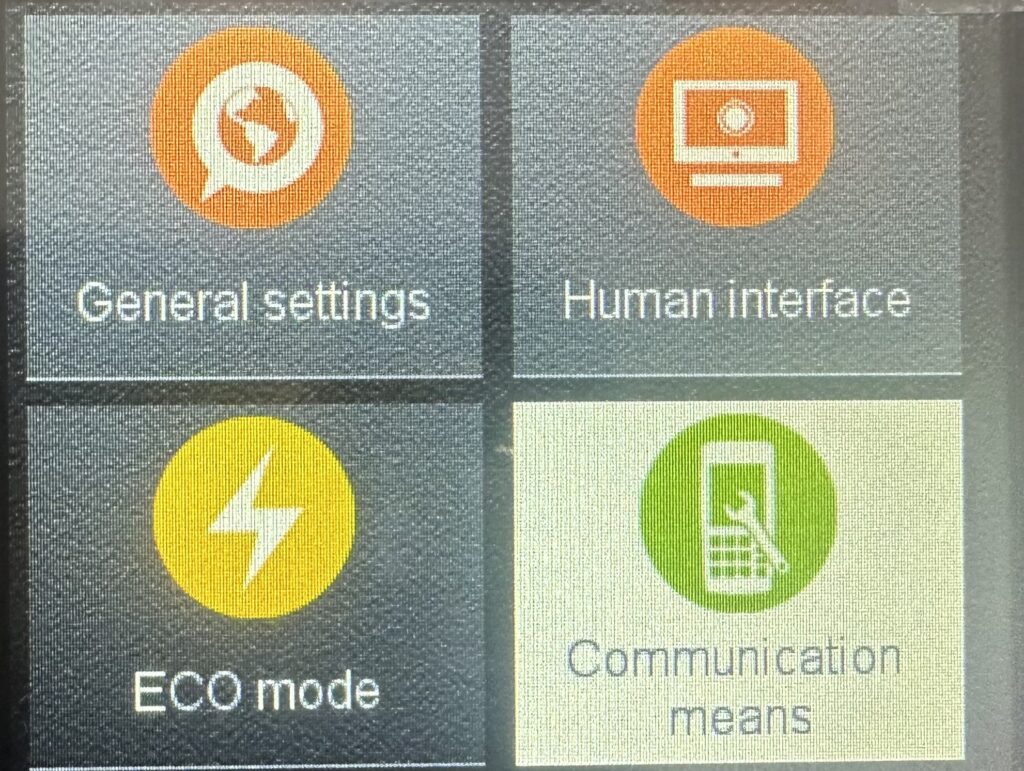
6. Press TERMINAL SETTINGS.
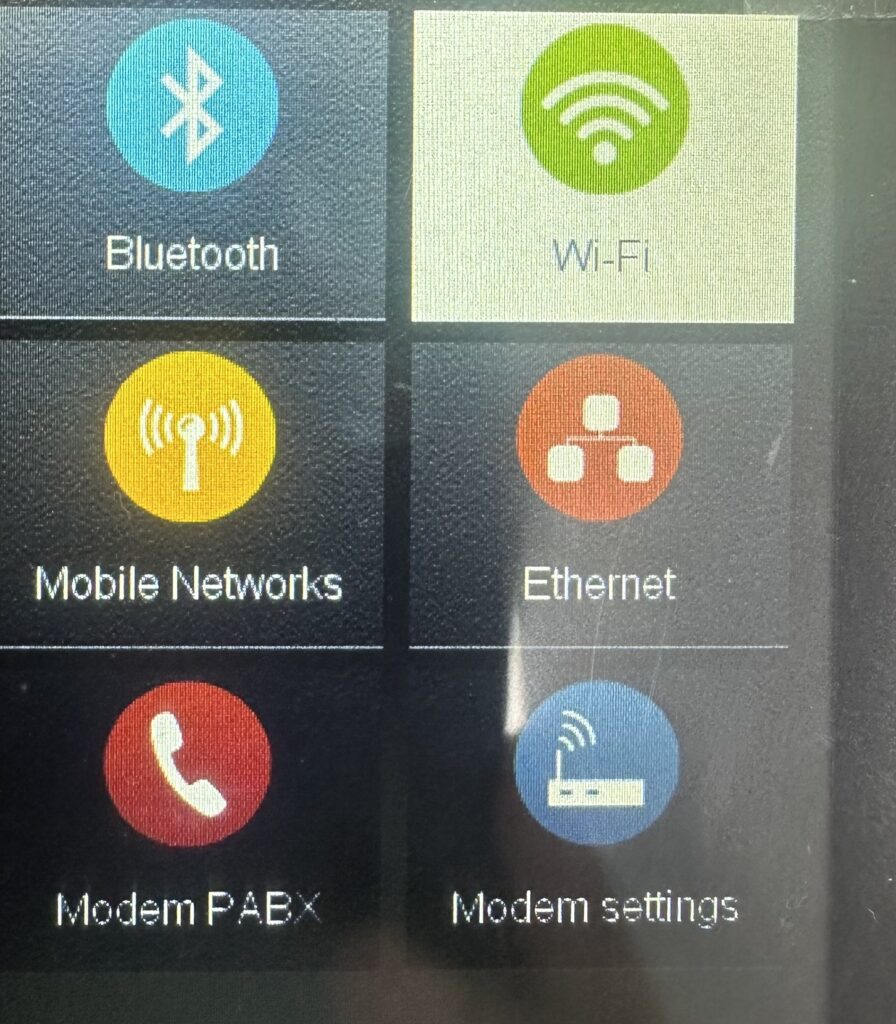
7. Press COMMUNICATION MEANS.
8. Press Wi-Fi
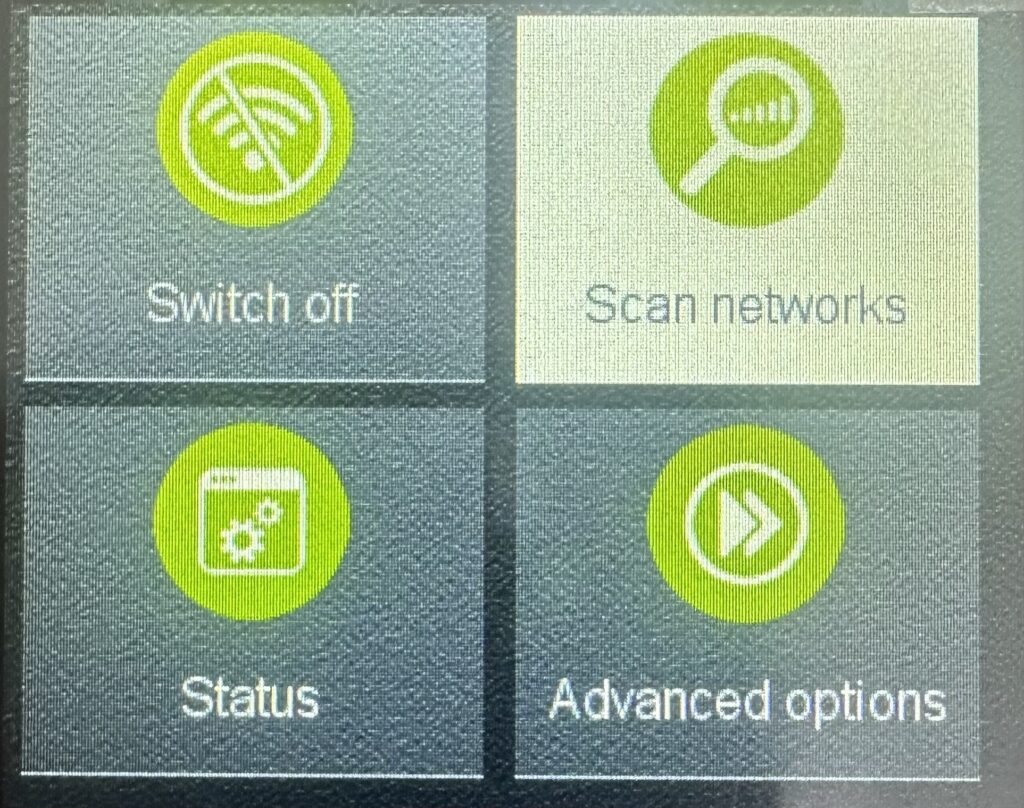
9. If the wifi is in Switch off mode , it means wifi is on.
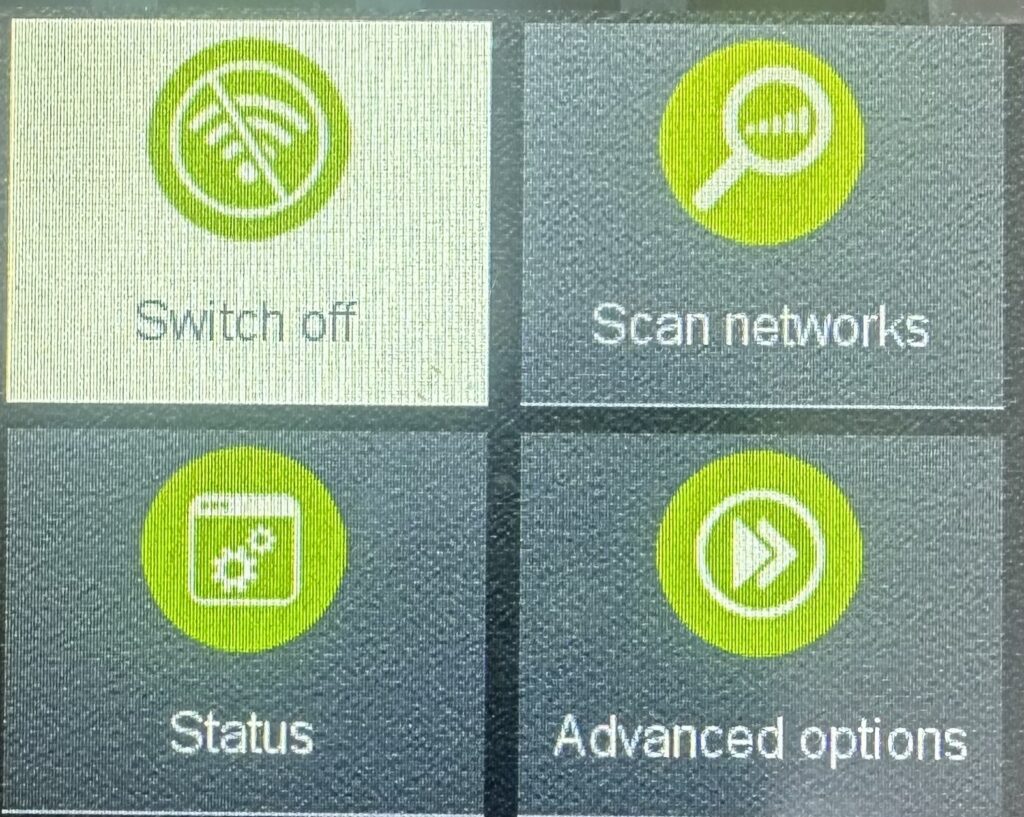
10. Press Scan networks.
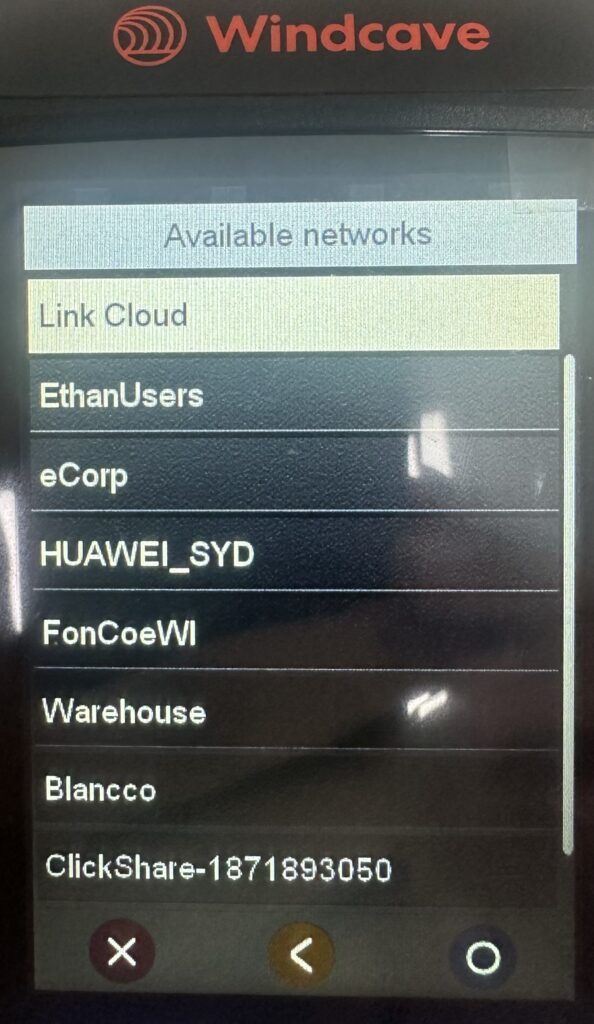
11. Select your WiFi network name from the available networks.
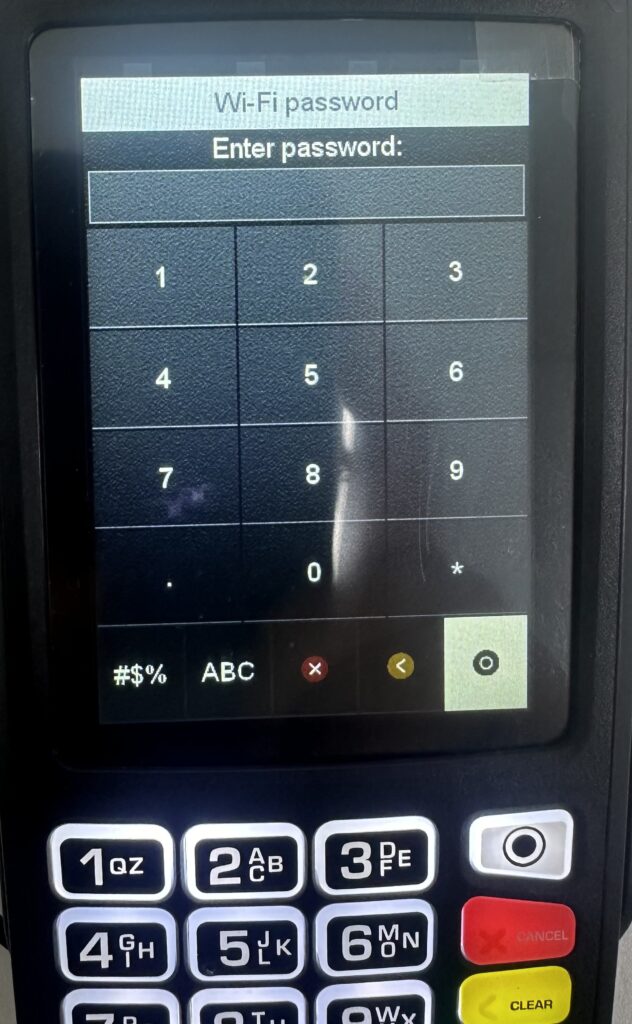
12. Enter Wifi password using keypad or through screen touch, then press ok.
Click ABC for the alphabets.Click #$% for symbols.
12. Press Clear + Func to reboot the terminal.

After rebooting, you will see a wifi signal on top, that means wifi is successfully connected . A logon can be performed to test network connectivity.


